| 15 ways to make a bad day worse & feel awful |
[view]
|
Similarly tagged posts
- No Related Posts
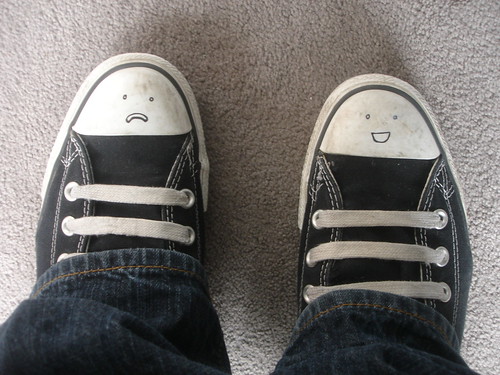
Image by mrlerone
1. Listen to sad & downbeat music. Music has a profound affect on mood. So if you’re looking for a sure-fire way to feel grumpy put on some sorrowful or angry tunes.
2. Drink a glass of wine. Or a bottle of vodka. Most drugs & alcohol are mood amplifiers & will enhance whatever your feeling at the time. Drinking heavily or taking drugs when you’re feeling down will only make things worse. Bonus points for drinking alone.
3. Pick a fight with someone you care about. Be a completely selfish diva & yell & call them names. Not only will you feel really guilty, but you will also have no one to talk to either.
4. Drink soft drink or eat lots of sugar. Sugar provides a temporary high. But after your body has processed all that glucose you’ll be left will sugar withdrawal & feeling lethargic & depressed.
5. Think nasty thoughts about everyone. The people on the bus, the chick at the checkout & that guy who’s walking in front of you taking up all the room on the footpath. Selfish bastard. Spread your negative vibes!
6. Watch the news. The nightly news is full of conflict, violence & horror & it’s all real. If you want to feel bad in no time then immerse yourself in stories about people at their worst.
7. Stay at home. Don’t go out & don’t talk to anyone. Even the most hardcore introverts will eventually become lonely if left by themselves for too long. Follow their example. Black out your windows.
8. Frown lots. Also, don’t forget to be rude & inconsiderate. Like attracts like, so you’re bound to bump into other grumpy people this way.
9. Read depressing stories & poetry. Shakespeare’s tragedies are a good place to start (Othello, Hamlet etc) East of Eden & The Bell Jar are two other contenders.
10. Likewise, watch gloomy films. A Scanner Darkly, The Grave of the Fireflies or just about any film about the Second World War are three that come to mind. Watch them alone.
11. Eat unhealthy food. You’ll feel really sluggish & guilty for treating your body like crap.
12. Remember every horrible thing ever said to you. All the insults & hurtful things that people have said to you over the years. Believe each one. Give those other people power over you.
13. Bottle it up. Refuse to cry & instead bury all your emotions. Then you will be resentful & even passive aggressive to those around you.
14. Wear lots of black. Don it with a sombre significance as if you are in mourning.
15. Quit smoking & drinking caffeine cold turkey & without any help or support. Watch as you grow more anxious & moody. If you do thins right you’ll go back to smoking or drinking coffee pretty quickly & then hate yourself for it.

Image by danske
Alternatively, you could realise that happiness is decision that you have to make on your own. Life is a matter of perspective & you can make the choice to be happy. Read 15 ways to lift your mood & feel awesome! & congratulate yourself on a job well done. Because you’re awesome & you know it!
<3
This post was written by Bella (contact) on March 19th, 2009 at and was filed under How To, Inspiration and tagged with the words Angry, Bad Day, How To, Inspiration . It contains 527 words, 2 images.
| Tea |
[view]
|
Similarly tagged posts
- No Related Posts
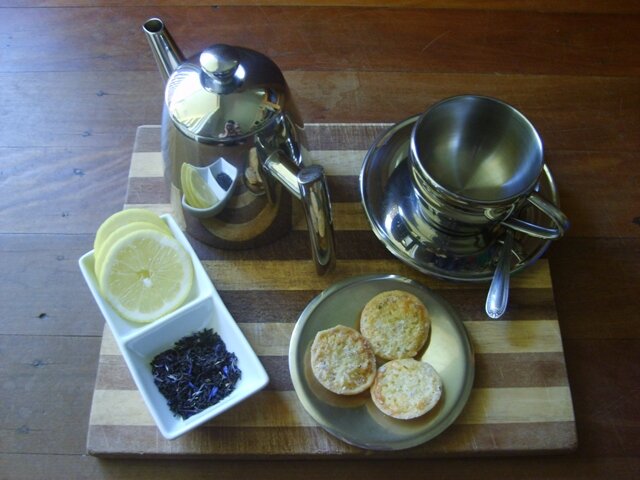
Afternoon tea is one of my favourite indulgences. It’s one of those rituals that can be as simple or as complex as you want it to be. Do you like your tea in a mug & with a choc-chip cookie or with silver service & hand cut sandwiches? After water, tea is also the most widely consumed beverage on the planet. Here’s my guide to making the perfect cuppa. I’ve been making tea & coffee in cafes for five years now & it still gets confusing & freaks me out sometimes. Hopefully these tips will help.
The Tea Leaves
One of the first things to take into consideration is the tea itself. Tea is harvested from the Camellia plant & cured & oxidised to yield black tea, oxidised for green tea & left alone for white tea. Red tea (or Rooibos) is derived from an entirely different plant altogether. The quality of tea will also effect the taste of your end product. Good quality loose leaf tea free of artificial flavourings is best. If you drink decaffeinated tea make sure you buy a leaf that has been decaffeinated using CO2 rather than methylene chloride (or an acetate, both of which taste a bit off). If they don’t state which method used on the label then methylene chloride has most likely been used, so ditch it quick!
Tea bags are a convenient way to brew tea but not many people know that the tea contained in them is the tea-dust from the bottom of the shipping bins. The flavour & quality of loose leaf tea is superior & when combined with a tea-infuser or tea-egg is just a little more environmentally friendly; it cuts out all that excess packaging. When brewing tea in a pot the general rule of thumb is one teaspoon of tea per person plus an extra teaspoon of tea ‘for the pot’. From experience this works out nicely :)
Milk & Sugar?
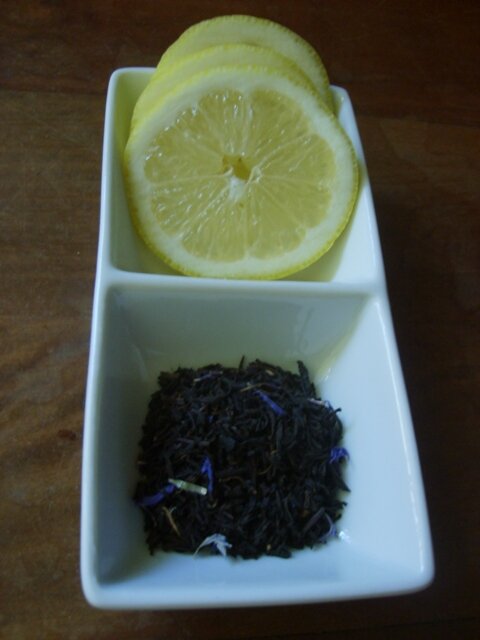
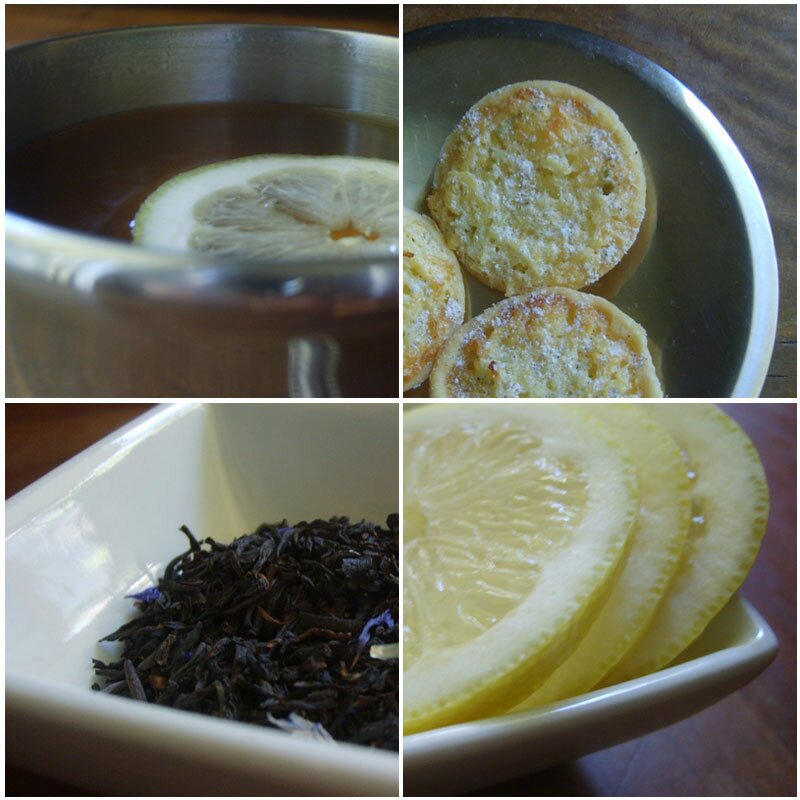
White, green & herbal teas aren’t generally served with milk while black & red teas are. The tea I chose to make today is a beautiful loose leaf Earl Grey (those blue flecks are bits of dried cornflower, yum!); a black tea flavoured with Bergamot essential oil. Bergamot is a species of citrus & so it doesn’t make sense to serve a tea like this with milk. Traditionally Earl Grey is served with a thin slice of lemon.
If you like your beverages nice & sweet then by all means use sugar or honey. Sugar cubes are a really cute way of serving & displaying sugar with your tea set. Otherwise Demerara sugar is best for sweetening up your cup! I will add though, that the flavour of unsweetened tea is subtle & delicious & those of you with a constant sweet tooth should definitely try it out sometime!
Service
Traditionally all tea services were made out of porcelain. However these days you can buy tea pots, cups & saucers, milk jugs & sugar bowls in glass, ceramic, earthenware, wood, stainless steel & precious metals like silver & gold. I say variety is the spice of life - so go for whatever piques your interest.
Brewing Times
Each type of tea will require a different brewing time & if you’re really professional, different water temperatures.
- Black tea can be brewed for up to four minutes (at 100 degrees Celsius),
- Green tea for up to three minutes (at 70 degrees Celsius),
- White tea for up to six minutes (at 80 degrees Celsius)
- Red tea for up to five minutes (at 100 degrees Celsius).
How to Brew a Pot of Tea
1. Boil enough fresh, cold, filtered water for one pot of tea.
2. While you’re waiting for the water to boil, fill the tea pot with hot water form the tap & let sit. This keeps the tea pot nice & warm. Pour this out once your water has boiled.
3. Fill a tea-infuser or tea-egg & place in the pot. If you don’t mind tea-leaves in your cup then just spoon the loose leaves right on into the tea pot. This is great for tea leaf reading!
4. Pour the boiled water into the pot leaving about 2cm of room at the top. (The tea leaves will expand making an already full pot will overflow!)
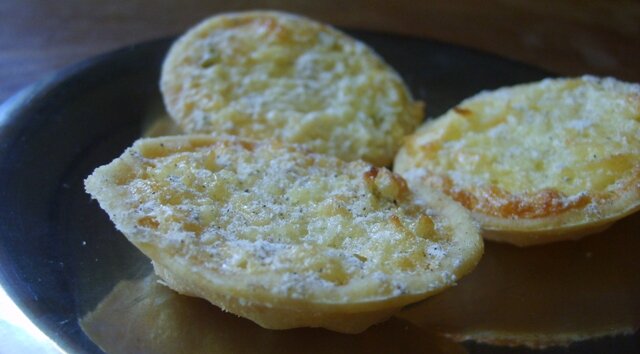
5. Let the tea sit & brew. Relax. Eat a sandwich, have another tart or sing a song while you wait.
6. Pour into cups & enjoy!
This post was written by Bella (contact) on March 17th, 2009 at and was filed under How To, Tasty Foodstuffs and tagged with the words afternoon tea, How To, Sweets, tea . It contains 726 words, 4 images.
| Pushover’s Anonymous or How To Say NO! |
[view]
|
Similarly tagged posts
- No Related Posts

Photo by Oknovokght.
First of all I would like to say that I don’t advocate the use of denial in people’s lives (at least not on a large scale!). If we lived our lives by saying “no” all the time we would be denying ourselves some incredible opportunities. Being open to these opportunities makes life wonderful. However, after seeing the film Yes Man I’ve had this thought playing on my mind & it wasn’t until the other day at the supermarket that I realised what it was.
My name is Bella & I am a pushover.
I was shopping for groceries & after wondering through the isles & picking up the things that took my fancy, I made my way the checkout. This particular supermarket was small, so there was only one register available & all the other customers were quietly lined up waiting to be served. I joined the end of the queue averted my eyes for a moment to check my basket had everything I needed & then looked up again. Lo & behold someone had pushed in front of me. I felt startled & somewhat affronted but said nothing. As the line moved on I started to feel more & more angry. Who the hell did this guy think he was? But instead of saying anything I stood there looking sour, feeling awful & took my frustrations out on the poor guy at the checkout by not responding to his hello. I stomped out of the store & then all of a sudden realised why I was so angry. I was angry at myself.
I had failed to stand up for myself & it made me feel hurt & angry. I recalled all the moments where I had given in to the wishes of other people against those of my own & realised that I was angry because in those situations I had never really taken into consideration what I wanted. I was being a pushover & saying “yes” to often to other people & “no” too often to myself.

Photo by Three-Legged-Cat.
When we’re children our parents are the voice of all authority in our lives. Mum & Dad tell us what to do & when we comply they lavish affection upon us. It’s this conditional affection that leads us to believe that if we ever want anyone to really care for us or to be valuable, we have to please them first, foremost & always. This means that rather than acting out of affection & fondness for a friend/job/lover a pushover acts out of fear. A fear of loss of approval. For this reason a pushover says “yes” even when they’re inclined to say “no”.
A pushover doesn’t fully know their value because they are constantly looking to other people for approval. When I was in high school I found that I was somewhat obsessed with making other people happy. This meant expressing views that weren’t akin to my own & going along with whatever anyone said or did. I had this constant need for approval, even from people I hardly knew. I only felt my worth when people gave me feedback. I began to feel like my life lacked control, direction & purpose. This is disastrously inappropriate.
So I decided to take charge. I said “yes” only when I wanted to & said “no” more often.
Find out what you want first
It is important to make sure that your new found use of the word “no” doesn’t become used with the same blindness that was once applied to “yes”. What I mean to say, is that before you say “yes” or “no” take a bit time to decide for yourself. What do you want?
- Take a moment to sit & think about the things you want in life.
- Make a list of your desires & dislikes. Dream up plans, goals & aspirations & then go for it!
- Read Tina Su’s article How to Design Your Ideal Life & put some of her suggestions into practice.
- Be brave!
Tit for Tat
It’s nice to be nice. Positivity & gratitude are wonderful things. But when you find yourself constantly at the mercy of another’s whims, when you’re plied for favours & when you’re never asked for your point of view/feelings/thoughts/plans then it’s time to think about saying “no!” Just because you’re a nice person does not mean that you need to be a pushover! When you feel like saying yes to things you’re not so keen on, try these tips;
- Make your participation conditional. I’ll help you with your mid-term report if you make lunch that day.
- Clarify your needs. I’d love to, but I need to go home & spend time with my family.
- Take a rain check. I’m busy right now, but I’m free later this afternoon/tomorrow/next week. How about then?
Stand up & be counted
When someone makes disparaging remarks or behaves in an overbearing way (or is being a bully!) don’t bow your head & avert your eyes. Don’t bottle it up or just take it. This kind of behaviour is dangerous for you & the people around you. Don’t repress your reactions! Stand up for yourself! Let them know in a calm & polite manner that they’ve crossed the line.
- Take a deep breath. Don’t get emotional or let your feelings get out of control. Standing up for yourself doesn’t mean making a scene.
- Be polite & speak clearly. Leave them in no doubt of the fact that you’re saying “NO!” I think you’re wrong or I don’t think this is right.
Remember who you are
The good opinion of loved ones & close friends is important. But self respect & self worth are also important. Remember those plans, goals & aspirations? Keep track of those achievements & congratulate yourself every so often. Remind yourself how wonderful you are & don’t forget to be awesome!
This post was written by Bella (contact) on March 11th, 2009 at and was filed under How To, Inspiration and tagged with the words Assertive, Goals, How To, NO! . It contains 960 words, 2 images.
| The Cat’s Meow |
[view]
|
Similarly tagged posts
- No Related Posts

Image by Maddest Hatter
The Cat’s Eye is a relatively simple make up style that consists of a line drawn along the eyelid ending with a small flick at the outer corner. It’s elegance lies in this simplicity. The Cat’s Eye is synonymous with all that is sophisticated, retro, glamorous & adorable. The Cat’s Eye is achieved with these five easy steps; Prime, Shadow, Line, Extend & Flick!
Employed by the likes of Christian Dior, Pola Negri, Marilyn Munroe, Betty Page, Amy Winehouse, Jean Paul Gaultier, Dita von Teese, Extravagent Goths & Fetish Models the Cat’s Eye proves that it’s also very versatile. A simple & demure black line & some mascara during the day can become smoky, alluring & sultry by night. Add a smooth line underneath the eye for a daring & dramatic look or extend the line into a bat-wing ala Winehouse. Add extra flicks to the outer corner for a bit of fifties revival or try experimenting with different colours (fuchsia, teal, violet, neon!)
So rather than writing a boring tutorial that could quite possibly be retitled “How To Draw A Line On Your Eyelid” I decided to give you all something a little more exciting.
—
The Cat’s Meow
-
For perfect Cat’s Eyes every time
you must first learn how to prime
(Too Faced Shadow Insurance works best I think)
Now being careful of course, not to blink
first Shadow, then Blend
any colour you please my friend!
-
After Shadow & Primer
bring out your liner
(M.A.C Penultimate Liner is a good sell)
Knowing small even strokes do work well
line your lid from end to end
as close to the lashes as your fingers will lend
-
At the corner give a quick flick
& wave around the mascara stick
Knowing that you cannot err
get ready to primp preen & purr
Because if you followed these instructions, written
you will now look like an adorable kitten!
—
& there you have it! It’s not so daunting that the most humble of makeup students would be afraid, & it’s exciting enough to be employed by kittens everywhere. Have fun!
This post was written by Bella (contact) on March 2nd, 2009 at and was filed under How To, Inspiration, Style and tagged with the words Beauty, Cat's Eye, How To, Make-up . It contains 329 words, 3 images.
| How to clean makeup brushes |
[view]
|
Similarly tagged posts
- No Related Posts
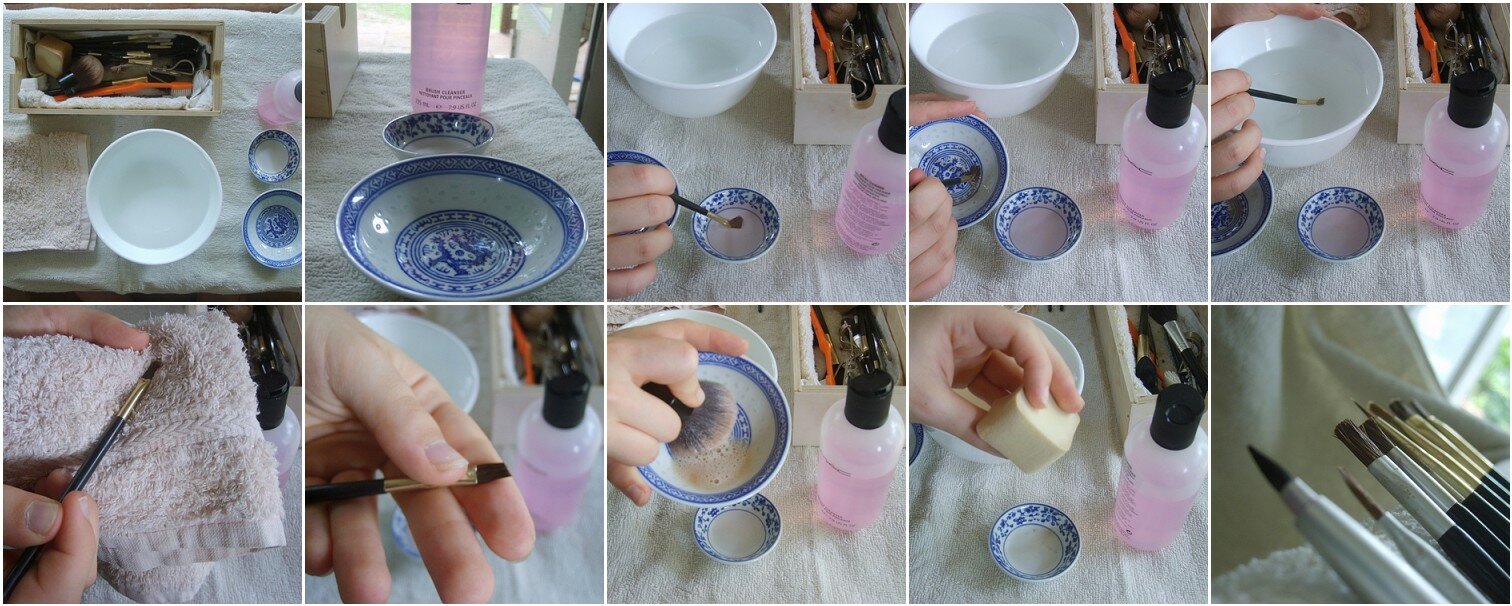
Cleaning your make-up brushes should be an important & regular part your beauty routine. If left to sit for long enough, they become the perfect environment for bacteria that can cause inflammation & infection in sensitive skin types. Gross! Because make-up brushes frequently come in contact with the skin, they also tend to accumulate a lot of oil, dirt & of course, make-up. Keeping you brushes clean ensures not only that they remain free of bacteria but also that they work just as well as they did they day you bought them. Here’s how to keep your make-up brushes squeaky clean.
First of all, you will need some equipment. Nothing expensive or complicated mind you, mostly items you can find around the house. Aside from the brushes that you’re about to clean, you will need: large bowl full of warm water, two smaller bowls (one for the detergent & one for lathering the brush) a facecloth or piece of cotton & most importantly, detergent. Any type of detergent will do; brush cleaner, shampoo, bubble bath, hand wash, body wash even dish washing detergent - they all contain the same chemicals in almost the same proportions. Lastly, be sure to cover the surface you’re working on. Newspaper, plastic wrap or an old towel work wonderfully.
Thoroughly Cleaning Your Make-up Brushes
1. Pour a small amount of detergent into one of the smaller bowls. Dip the dirty make-up brush first into the water & then into the detergent.
2. Swirl the bristles around the second small bowl to create a lather & save your hands from getting wet & covered with old make-up residue.
3. Rinse the brush in the bowl of warm water.
4. Pat dry using the facecloth or cotton.
5. Reshape the brush tip & let air dry!
You can use this method to clean any & all make-up brushes as well as flocked sponges. I find that it’s best to leave the clean brushes to dry in a place where they won’t be disturbed for eight hours or so. Most experts agree that personal make-up brushes should be cleaned at least once a week. This can be a bit much for some (myself included!) so below is a quick fix way to clean make-up brushes that doesn’t take too long & doesn’t require eight hours of drying time.
For this to work you will need to use a professional brush cleaner or brush shampoo. I use the brush cleanser developed by MAC. It costs around thirty dollars for 200ml but you only need to use a small amount of liquid each time. According to the girl who sold it to me, it’s also anti-bacterial & fast acting.
Quickly Cleaning Your Make-up Brushes
1. Pour a small amount of brush cleaner into one of your small bowls. Dip in the dirty make-up brush & give it a bit of swirl.
2. Pat dry using a tissue & viola! Done!
While on the subject of brushes, I’d like to point out the importance of good quality brushes. Cheap brushes are likely to shed & to fall apart because of the adhesives used. They’re also likely to be made out of animal hair, usually squirrel or goat. You can can never be sure that the bristles in these brushes were collected in a manner free of cruelty. In fact, it’s probably better to avoid using make-up brushes made out of animal hair altogether. Brushes form the Body Shop do not contain animal hair. Levhead & Aromaleigh also sell cute & reasonably affordable animal-friendly make-up brushes, though Aromaleigh won’t ship them to Australia. By far, my favourite animal-friendly make-up brushes are the Walk On The Wild Side brushes from The Brush Company - the bristles are the most amazing shade of electric blue!
This post was written by Bella (contact) on January 8th, 2009 at and was filed under How To, Inspiration and tagged with the words Beauty, Brushes, Cleaning, How To, Make-up . It contains 618 words, 2 images.
[ Bellas Threads powered by Wordpress | Website skin layout generated by Myspace Layouts. ]

